
 1pcs 3.0mm Pitch SMT DIP ...
 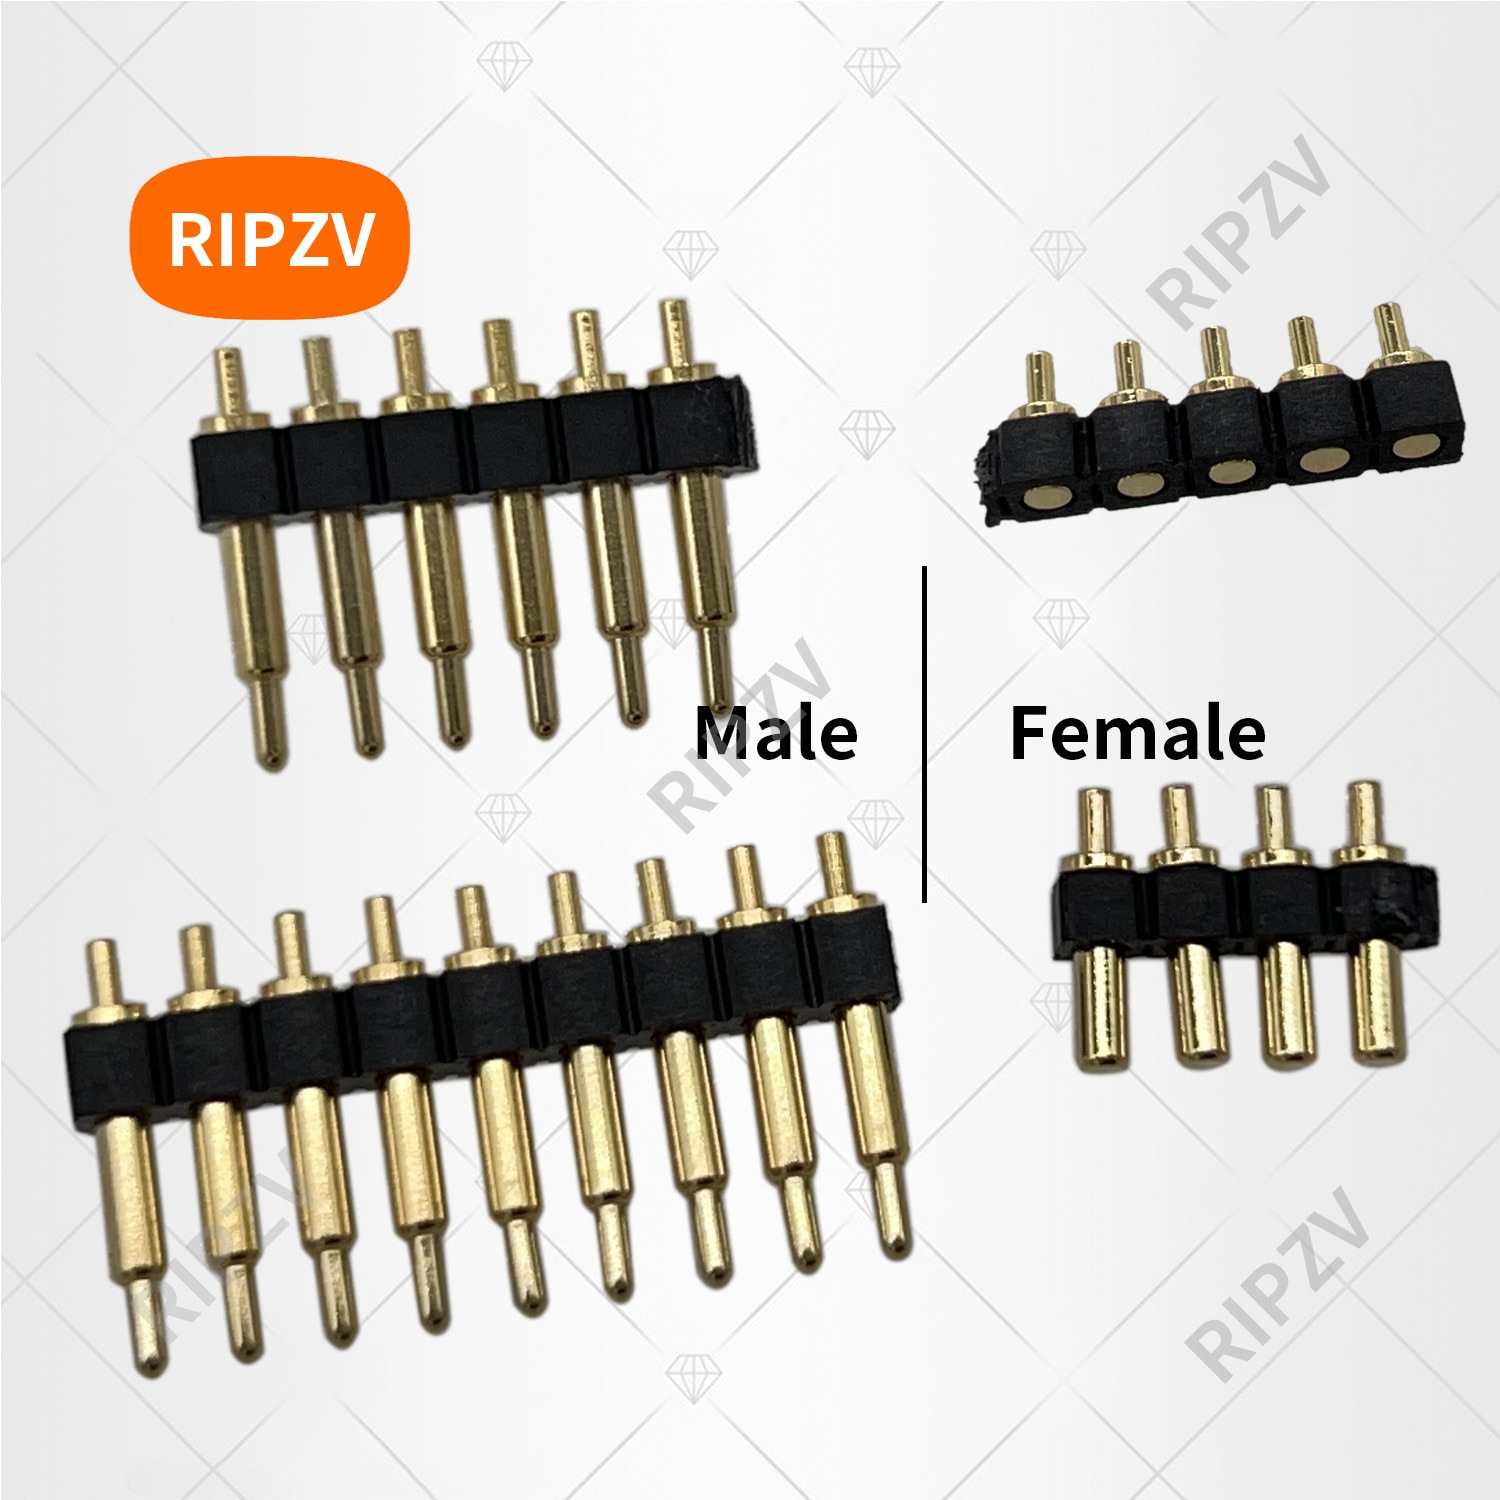 1pcs Male / Female Spring...
 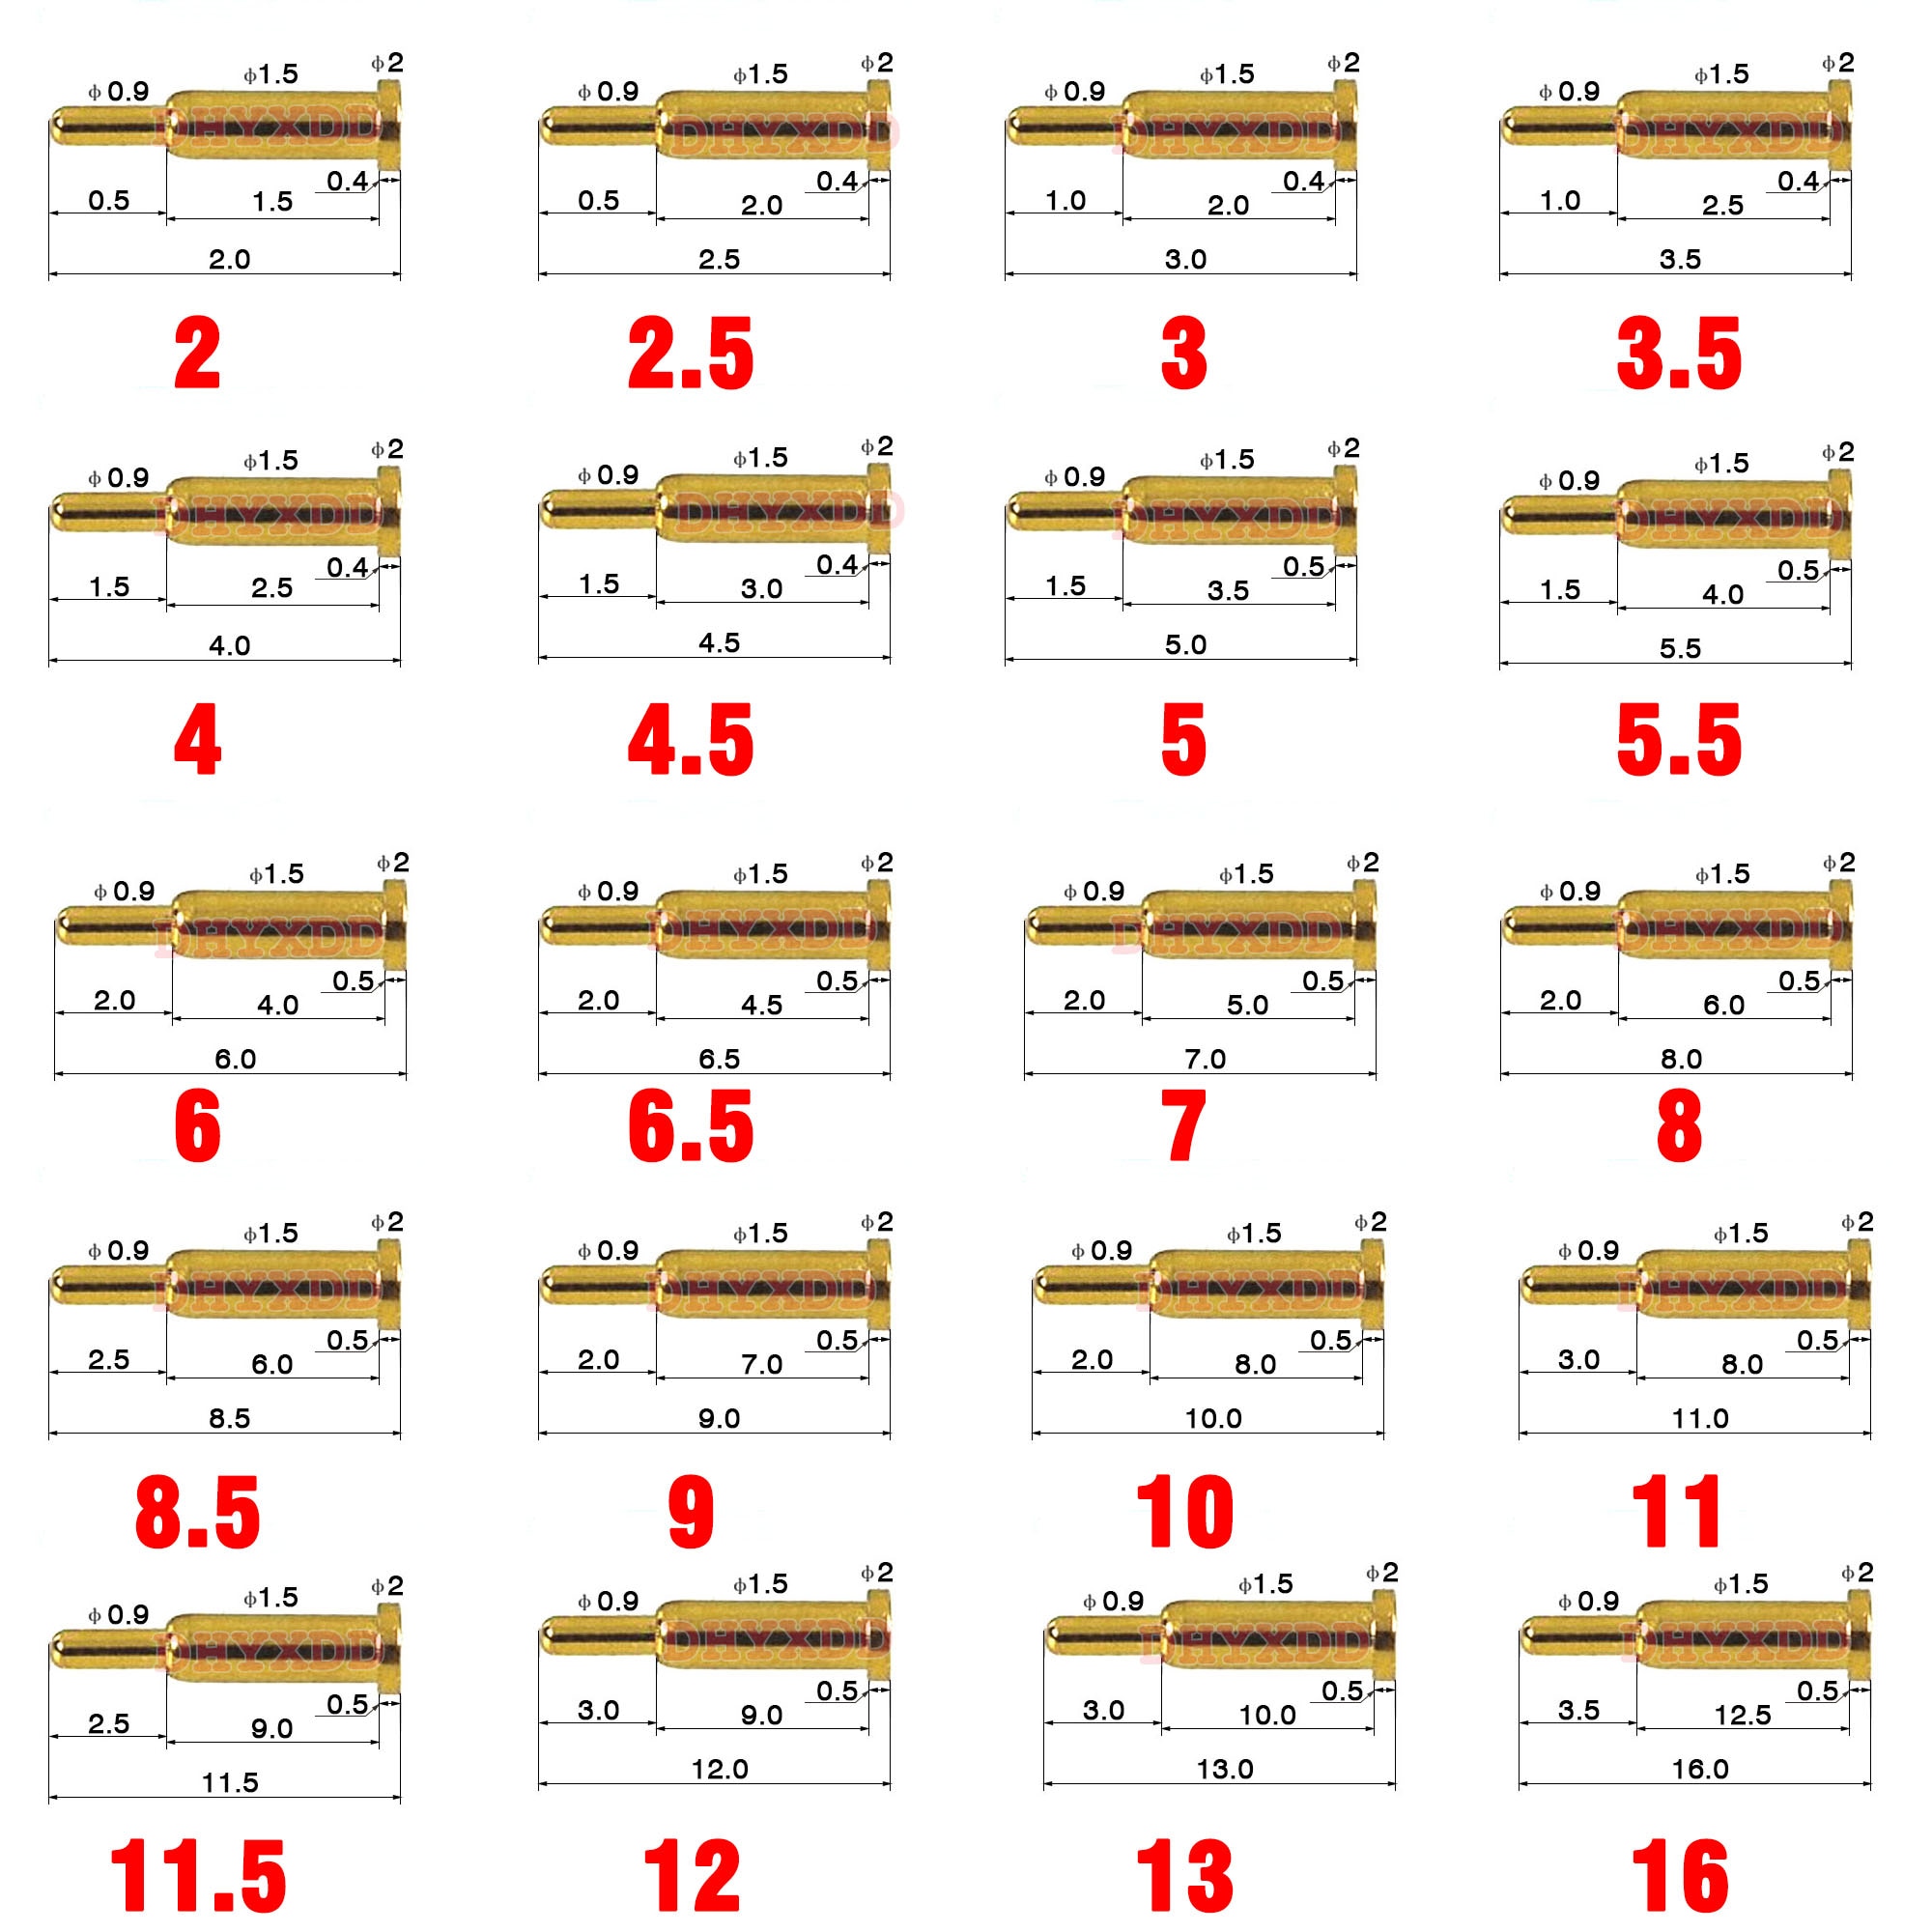 5Pcs Pogo Pin Connector P...
 Add Product Guide
How to Add a Product
1. Log-in and Navigate to Add Product under Marketplace Tools on your Seller Account Page
2. General:
Product Name – product name / part #
Description – description of your product
Meta Tag Title – title of product for the title to be shown in the browser
Meta Tag Description – description of the product in search engines
Meta Tag Keywords – keywords associated with your product
Product Tags – tags to define your product / keywords for our store
3. Data:
Model # – part / model # of the product
Location – location where the product is shipped from
Price – price of the product per piece
Tax Class – how the products tax is calculated
Quantity – the quantity of products in stock
Minimum Quantity – minimum quantity to order
Subtract Stock – subtract the stock when product is ordered
Status – enable / disable product from store
Out of Stock Status – notification when the product is out of stock
Requires Shipping – yes= requires to be shipped / no= cannot be shipped
SEO Keyword – title of keywords in the address bar after https://www.springcontacts.com/
Image – Primary image of your product
Date Available – when the product becomes available in the store
Shipping Dimensions – LxWxH of the package the product will be shipped in
Shipping Length Class – unit used to determine the LxWxH
Shipping Weight – Weight of a single product
Shipping Weight Class – unit used to determine the weight
Sort Order – order of your products shown in your store
4. Links:
Manufacturer – the manufacturer of the product
Category – select the categories that your product is relative to
Filters –
Downloads –
Related Products – products that are related to your product
5. Attribute:
Add attributes to define your product specifications:
Step 1: Click the + to add a attribute
Step 2: Pick an attribute from the drop down list

Step 3: Choose from the preset list or enter in custom text
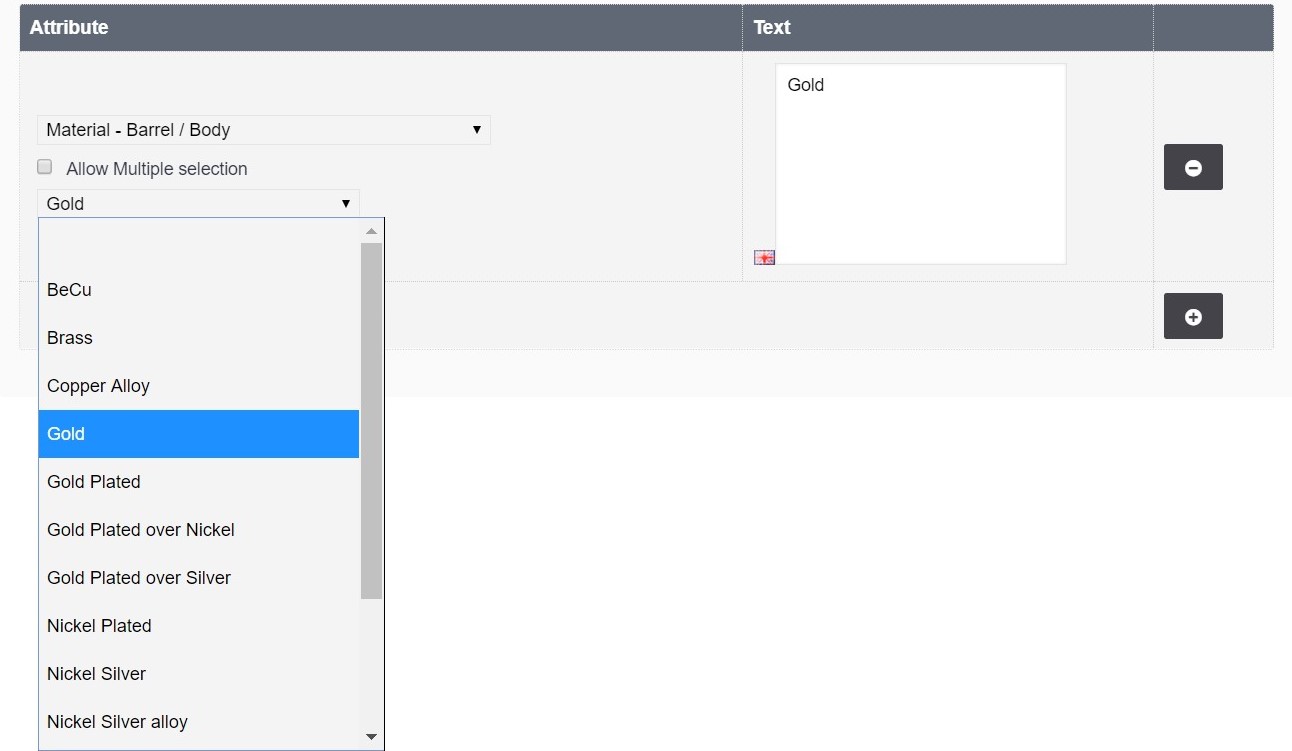
Step 4: Add as many attributes as necessary to provide the specifications of your product. Complete attributes = more views of your product during searches.
Don’t see an attribute you need or have a question about an attribute? Please Contact Us.
6. Option:
Step 1: Select the Option Folder, then begin to type an option. The field will auto-fill with selections to choose from.
Step 2: Select an option type, and then click + to add an option value.
Step 3: Populate the Option Value, Quantity, etc.
Select as many options as necessary to ensure proper ordering of your product.
7. Discount:
Step 1: Click on + to add a discount for the product
Step 2: Select which customer group this discount can apply to
Step 3: Enter the quantity the customer needs to order for the discount to apply
Step 4: Priority
Step 5: Enter the discounted price of the product
Step 6: Enter the date which this discount is valid from
Add as many discounts as needed to display all the possible discounts for large order quantities.
8. Special:
Step 1: Click on + to add a special for the product
Step 2: Select which customer group this discount can apply to
Step 3: Priority
Step 4: Enter the price of the special
Step 5: Enter the date which this special is valid through
9. Images:
Add the main image and any additional images you have for the product.
If you have any further questions about adding a product, please contact us.